 blog
9 Best Tools for Teaching AAC in Schools
Last Updated: October 25, 2026
Quick Summary
The best tools for teaching AAC in schools are simple ones a busy teacher can run on a Tuesday morning, starting with the simplest tool that works, such as a printed core board, before moving to apps or speech-generating devices. Teaching AAC also means modeling symbols while you talk, building communication into everyday routines, and sharing the setup with every adult in the room.
- Low-tech tools like printed core boards need no power and are usable the same day.
- Keep a printed core board as a low-tech backup for every high-tech user.
- Model by tapping symbols as you talk, then wait longer than feels normal.
- Pick two moments per day and commit to them for a month.
- Track independent communication attempts and message variety once a week to see if a tool works.
Table of Contents
- What Teaching AAC in Schools Actually Requires
- Low-Tech and High-Tech Communication Tools Compared
- AAC Teaching Strategies for Teachers That Fit Real Lessons
- AAC Modeling in the Classroom: What Adults Actually Do
- Building an AAC Classroom Toolkit on Any Budget
- AAC Lesson Plans for Schools: Math, Literacy, and Routines
- How to Choose Tools for Each Student and Measure Progress
- Get a Free Sample and Try One Lesson This Week
- Frequently Asked Questions
What Teaching AAC in Schools Actually Requires
Teaching AAC in schools means giving a student a way to communicate that does not depend on speech, then building chances to use it into the school day.
Here is the core problem. Most guides hand you a device name and stop.
Below, we break down what teaching AAC really asks of a school, compare low-tech and high-tech options, and share the strategies and lesson ideas that make it doable.
AAC in Plain Terms
Augmentative and alternative communication (AAC) is any method a person uses to share messages without spoken words. (Augmentative and Alternative Communication (AAC)) That can be a paper picture board, a tablet app, or a mix of both.
Think of it as a toolbox. Some tools are paper and cheap. Some are digital and pricier. For a plain-language overview of how schools support non-speaking students, the American Speech-Language-Hearing Association's guide to AAC is a good starting point.
Low-Tech and High-Tech Communication Tools Compared
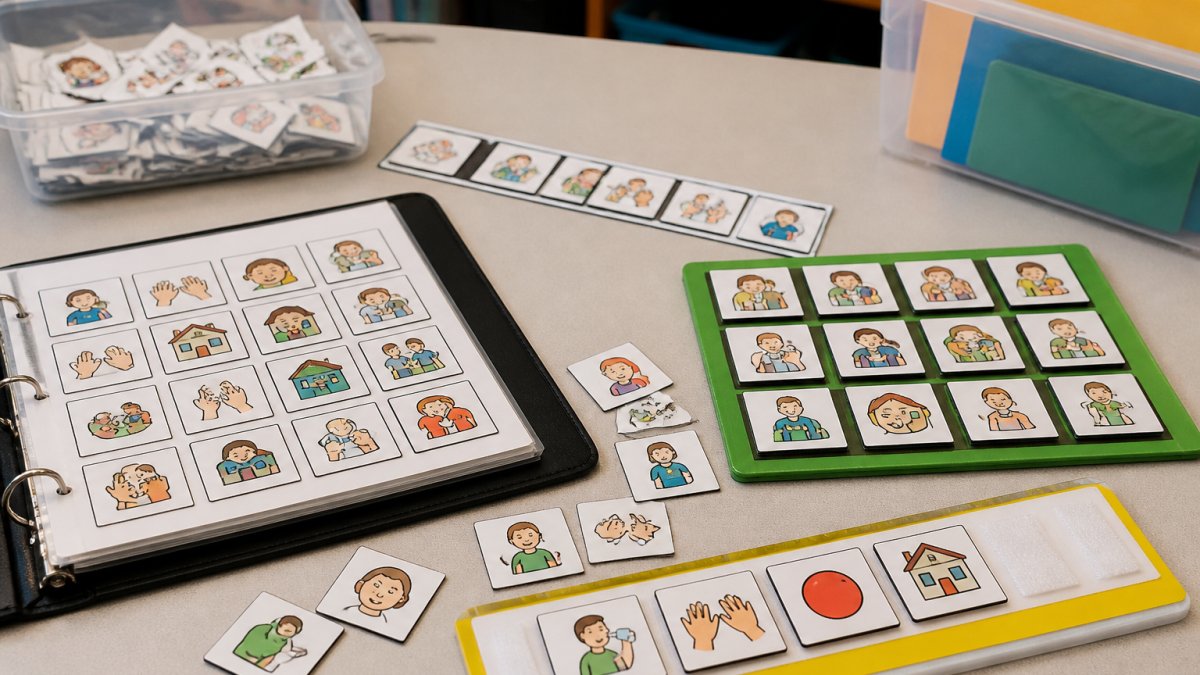
Low-tech tools are printed or handmade and need no power. High-tech tools run on a device and often speak out loud. Neither is "better." The right pick depends on the student, the classroom, and the budget.
Most guides stop at that sentence. The useful part is comparing actual tools by how they work in a school day. Below is a plain-language comparison of common AAC tools grouped by what a teacher needs them to do.
| Tool | What it is | Best classroom use | Access method | Learning curve for staff | Watch out for |
|---|---|---|---|---|---|
| Printed core board | One page of high-frequency words (I, want, more, stop, go) | Whole-class routines, snack, circle time | Pointing or eye gaze | Very low, usable the same day | Hard to add new words without reprinting |
| Communication book | Binder of picture cards organized by topic | Choice-making, transitions, small groups | Pointing, page turning | Low | Pages get lost or out of order |
| Single picture cards | One image per card | Snack, bathroom, choice moments | Handing or pointing | Very low | Limited to one message at a time |
| Alphabet board | Letters for spelling | Older students who can spell | Pointing or eye gaze | Low | Slow for long messages; frustrating for some |
| Switch-accessible device | Dedicated device with one or few large buttons | Students with limited hand control | Switch, head pointer, or eye gaze | Moderate, needs setup | Requires matching the switch to the student |
| Speech-generating device (dedicated) | Standalone talking device with symbol grid | Students who need clear spoken output all day | Touch or switch | Moderate | Charging, repair, and replacement planning |
| Communication app on a tablet | Software with symbol grids or text | Flexible vocabulary that grows with the student | Touch, switch, or eye gaze | Moderate to high, setup and customization | Needs device management, charging, and backup |
A few practical notes for teachers new to AAC:
- Start with the simplest tool that works. A student who has never used a paper board may struggle with a complex app. Paper first is a common and safe pattern.
- Match the access method to the student's body, not the catalog. A student who can point precisely may do well with a detailed app. A student with limited reach may need larger targets, a switch, or eye gaze. This is where a speech-language pathologist's input matters most.
- Plan for a backup. A dead tablet or a lost binder silences a student. Keep a printed core board as a low-tech backup for every high-tech user.
- Check who supports the tool all day. A tool only one adult knows how to run will fade by lunch. Share the setup with the general education teacher and paraprofessional.
A common mistake is buying the fanciest device first. In practice, a student who has never used a paper board may struggle with a complex app. Start with the simplest tool that works, then grow.
AAC Teaching Strategies for Teachers That Fit Real Lessons
The best strategies take seconds, not extra prep periods. Here are the ones that hold up in a real classroom:
- Wait longer than feels normal. After you ask a question, pause and look at the student. Many adults jump in too fast.
- Model without pressure. Point to symbols as you talk. You are not testing the student. You are showing how it works.
- Build it into routines. Use the board at snack, line-up, and calendar time. Same moment, every day.
- Follow the student's lead. If they point to "dinosaur," talk about dinosaurs. Interest drives communication.
- Keep the tool within reach. A board on a shelf is a board that never gets used.
For a fuller, step-by-step walkthrough, our guide on AAC strategies for non-speaking learners breaks these into seven classroom steps.
AAC Modeling in the Classroom: What Adults Actually Do
Picture a teacher at snack time. She says, "I want crackers," and taps I, want, and crackers on the board. Then she waits. The student may tap one symbol or none. Both are fine.

What most guides miss is that paraprofessionals matter here as much as the lead teacher. Our set of AAC visual supports for elementary students gives every adult in the room the same simple starting point.
Building an AAC Classroom Toolkit on Any Budget
You do not need a big budget to start. A workable toolkit can begin with paper, a printer, and a plan.
- Free first: print a core board, laminate it, and tape it to the student's desk.
- Reuse what you have: old binders become communication books.
- Check district resources: many districts already own devices or apps that sit unused.
- Ask about licensing: some apps charge per device, others per student. Confirm before you buy.
- Plan for charging and storage: a dead device is a silent student.
Pricing for any paid tool depends on the provider and the plan, so check the provider's site for current costs. For CueSprout's own downloads, see our pricing page for what each option includes.
AAC Lesson Plans for Schools: Math, Literacy, and Routines
You do not need a separate AAC lesson. You need to fold communication into the lessons you already teach.
- Math: model more, all done, and numbers during counting and sorting.
- Literacy: pause on a repeated line and let the student "read" it with the board.
- Routines: use the same symbols at arrival, snack, and clean-up every day.
Consistency beats complexity. If you want ready-made plans to adapt, our AAC lesson plan templates for elementary students save the setup time.
Watch out: a plan that only the special education teacher uses will fade. Share it with the general education teacher and the paraprofessional so the student gets the same support all day.
How to Choose Tools for Each Student and Measure Progress
Choosing a tool starts with the student, not the catalog. Ask three questions:
- What does the student already try to communicate? Requests, protests, comments, or asking for help?
- What can the student physically access? Pointing, touching, switch use, or eye gaze?
- Who will support them all day? One adult or many, and do they all know how the tool works?
Match the tool to those answers. A student who can point precisely may do well with a detailed app. A student with limited reach may need larger targets, a switch, or a partner-assisted approach. This is where a speech-language pathologist's input matters most.
A Simple Way to Measure Whether It Is Working
You do not need formal testing to see progress. Watch for these observable signs and jot them down once a week:
- Independent communication attempts. How often does the student use the tool without an adult prompting first? A rise here is the clearest sign the tool fits.
- Message variety. Is the student using one symbol or many? Growth from one word to several shows the tool is not too limited.
- Use across people and settings. Does the student use it with the teacher, the paraprofessional, and peers, at snack, in math, and at recess? A tool used in only one room is not yet working school-wide.
- Participation in routines. Can the student join calendar time, choice time, or clean-up using the tool? Participation is the goal, not perfect grammar.
- Frustration signals. Fewer meltdowns or give-ups around communication moments can be a sign the tool is reducing the struggle to be understood.
Keep it simple. Note how often the student uses the tool without a prompt, and in how many settings. Growth in real moments, not test scores, tells you it is working. The Center for AAC and Autism's guidance on AAC and autism offers plain background on how communication develops over time.
Get a Free Sample and Try One Lesson This Week
The gap in most classrooms is not a lack of tools. It is time. Building boards, writing plans, and training staff all compete with everything else on a teacher's plate.
That is the problem CueSprout exists to solve. Our ready-to-use printables, PowerPoints, and lesson plans cut the time spent making materials from scratch.
You do not have to overhaul your classroom to begin. Pick one routine, one board, and one week.
Frequently Asked Questions
What tools help teachers teach AAC in the classroom?
The most useful tools fall into a few groups: communication boards and picture cards for low-tech access, speech-generating devices and communication apps for spoken output, and printable modeling guides and planning forms that tell adults what to do. For most elementary classrooms, a mix works best. Keep a picture board on the table, a core vocabulary display on the wall, and a simple plan for which words you will model during math and literacy. The tool matters less than whether adults use it consistently every day.
How can teachers model AAC during everyday classroom activities?
Modeling means pointing to or pressing symbols while you talk, without requiring the student to respond. During morning meeting, touch 'good' and 'morning' as you greet the class. In math, point to 'more' and 'same' while comparing groups. At snack, model 'want' and 'open.' Aim for short, frequent moments rather than long sessions. AAC modeling in the classroom works best when it is tied to routines you already run, so you are not adding a separate activity to your day.
What should be included in an AAC classroom toolkit?
A practical AAC classroom toolkit usually includes a core vocabulary board, topic-specific picture cards for math and literacy, a communication book or app for students with individualized systems, adult modeling guides, a simple planning form for which words to target each week, and peer awareness materials so classmates know how to interact. Add a way to track participation, such as a short weekly note on which students used their system during group work. Ready-made printable kits can save hours of preparation.
How do you choose AAC tools for a student at school?
Start with the student's communication needs, not the device. Ask what the student needs to express during the school day, how they currently access symbols (direct selection by finger, eye gaze, or switch), and what support staff are available. The speech-language pathologist leads the formal assessment, but teachers should share what they see in class. Then trial options in real routines before committing. Individualized support matters more than the brand of the tool, and a low-tech board that gets used beats a high-tech device that stays in a cupboard.
Ready to see how it fits your room? Get a free sample from CueSprout and try one lesson this week. Start with a single routine and watch what happens when a student finally has a way to be heard.